How to contour
To contour, choose a matte, neutral-to-cool shade one or two shades deeper than your skin. Apply a little after foundation: cream before setting powder, powder after. Start near the outer cheekbone hollow, then blend the edge upward toward the hairline. Check in daylight and build only where you want more definition.
Choose your formula and routine order
| Formula | Routine order | Tool and amount | Build and blend |
|---|---|---|---|
| Cream | After base, before setting powder. | Synthetic brush or sponge; a light dab. | Tap outer cheek upward; blend before layering. |
| Contour stick | After base, before powder; check instructions. | Synthetic brush; pick up a small swipe from your hand. | Press on; avoid dragging. Soften, then build. |
| Powder | After base and setting powder; no tackiness. | Soft angled brush; light pickup, excess tapped off. | Sweep outer hollow upward; build lightly. |
| Darker concealer or foundation | After matching base, before powder. | Small brush or sponge; part of a tiny dot. | Tap and blend promptly; check before layering. |
On dry skin, a thin cream layer may be easier to blend than powder. On oily skin, try powder or lightly set a cream once it is blended. For combination skin, adjust by area; the makeup wear guide covers prep and touch-ups. You only need a formula that suits your base and a clean tool; see makeup brushes for beginners.
Choose a contour shade for your skin depth
Choose a matte, neutral-to-cool shade about one or two shades deeper than your skin. Swatch a little where you will wear it, blend and check in daylight: it should read as a soft shadow. Depth and undertone are separate; the undertone test helps you compare undertone clues, but does not match a contour product.
| Skin depth | Shade to try | If it looks wrong |
|---|---|---|
| Fair | A light, cool matte taupe; apply very sheerly. | An orange edge suggests too much warmth; a heavy grey stripe may need less product or a less grey taupe. |
| Light to medium | A matte neutral-to-cool taupe-brown. | If it looks dirty after blending, try a thinner layer and a less grey neutral brown before going darker. |
| Medium to tan | A matte neutral-to-cool brown with enough depth to show. | A pale taupe can look dusty. Try a deeper neutral brown rather than adding layers of the pale shade. |
| Deep | A rich matte neutral brown with less grey pigment than an ashy taupe. | If it leaves an ashy cast, try a less grey neutral brown with enough depth. Do not compensate by piling on more product. |
How to contour step by step
- Prepare a thin base. Let skin care settle, then apply foundation and spot-conceal where needed. The foundation guide covers a base that stays even under other products.
- Check the order. Leave the contour area unpowdered for cream, stick or a darker liquid base. For powder contour, lightly set any tackiness first so the pigment does not grab.
- Load your tool lightly. Tap off powder or work a little cream on your hand. A contour stick is easier to control when picked up with a brush than drawn on as a thick stripe.
- Start at the outer cheek. Feel for the cheekbone with your face relaxed and tap a small amount just below it, near the ear. Keep the first patch small enough to soften.
- Blend the edge upward and back. Tap cream or use light strokes for powder toward the hairline. Keep the deepest color close to where you placed it; do not sweep the whole patch down the cheek or into blush.
- Check before building. Look straight ahead and turn your head in daylight. Use a clean part of the brush or your base sponge to soften the boundary, then add a sheer layer only where definition is missing.
- Finish without disturbing the base. Add blush with a separate tool and set cream lightly where needed. Keep any additional contour at the temples, jaw or nose softer than the cheeks.
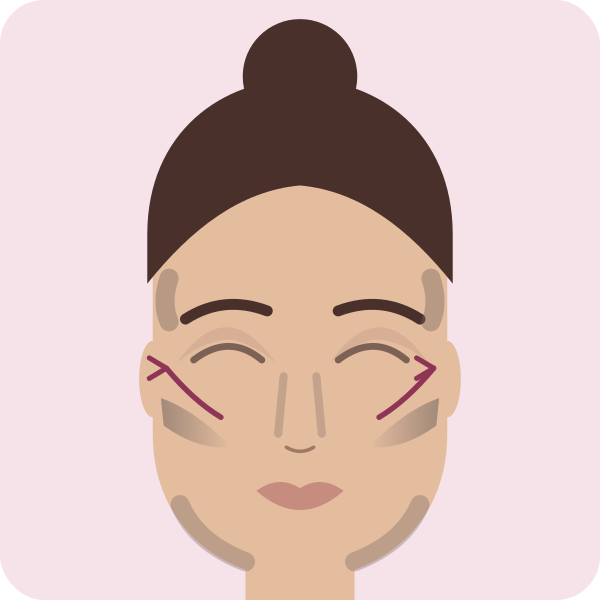
Placement: a simple starting point
- Cheeks: follow the drawing's outer cheek zones; soften the edge upward with a clean tool.
- Temples and jaw: use leftover product in the marked areas, fading into the hairline and neck.
- Nose: the faint bridge marks are optional; use a small brush and leave the tip soft.
Use the face shape guide for per-shape placement.
The sample preview is an AI illustration of the whole look; it does not map contour to your face.
Fix stripy, muddy or patchy contour
| Problem | Likely cause | Fix |
|---|---|---|
| A hard stripe | A thick stick line, a dense brush or pressure that deposits pigment in a narrow band. | Tap over the edge with your base sponge and its remaining foundation. Keep the darkest part near the outer cheek; soften the boundary rather than spreading the whole stripe. |
| Muddy or grey contour | Cream rubbed over set powder, too much contour, a too-cool shade on deep skin, or contour blended into blush. | Stop adding pigment. Lift the mixed patch with a damp sponge, then repair the base locally. Reapply less contour in the correct routine order, or switch to a less grey neutral shade. Keep blush separate; see how to apply blush. |
| An orange band | The shade is too warm to look like a shadow against your skin. | Soften with a little skin-matching base. Next time test a neutral-to-cool contour in daylight; adding more of the orange shade will not correct its undertone. |
| Foundation lifts or turns patchy | Dragging a stick or scrubbing a brush moves the base; wet contour over powder can also catch. | Stop rubbing. Remove and rebuild only the lifted patch if tapping cannot smooth it. Let the base settle, then press on cream before powder, or apply powder contour to a lightly set base. |
| Contour sits too low | The first mark was below the cheekbone hollow, or blending spread pigment down toward the mouth. | Tap skin-matching base over the lower edge to reduce the patch. Place a small amount higher in the outer hollow and blend its edge upward, keeping the cheek below clean. |
| Definition disappears in photos | Strong front lighting flattens the shadow, or the shade is too close to your skin depth. | Check a test photo in the lighting you will use before adding more. Build a thin layer at the outer cheek only if needed; avoid making the whole face darker. See makeup for photos. |
Keep the cheek products distinct as you blend
| Product | Role | Blending check |
|---|---|---|
| Contour | Matte, neutral-to-cool depth that reads as shadow. | Keep the deepest patch controlled and soften its boundary. |
| Bronzer | Warmth on the areas the sun would hit. | Use a separate tool so warm bronzer does not change the contour shade. |
| Blush | A flush of color on the cheeks. | Blend its edge without mixing its strongest color into the contour. |
| Highlighter | Reflected light on the areas you want to bring forward. | Keep shimmer above the contour so the shadow stays matte. |
Frequently asked questions
Do you contour before or after foundation?
After foundation is the simplest starting point: you can see how much definition your base leaves visible. The next decision depends on texture. Blend creams while the area is unpowdered; let powder contour meet a lightly set surface. The formula table above gives the order for each option.
Is cream or powder contour easier for beginners?
Neither is automatically easier. A sheer formula you can control matters more than its format. If your base stays dry, try a small cream dab; if it gets oily, start with lightly applied powder. Test one cheek first so you can judge the finish before committing to both.
Can I contour with concealer or foundation?
Yes. A darker base can work if it dries without shimmer and leaves a neutral shadow when blended. Check its finish on your skin before using it across the face: coverage and drying speed vary. Brightening concealer does the opposite job, so save that for areas you want lighter.
How do I blend contour so it is not muddy or stripy?
Stop adding color and check the edge with a clean tool. A stripe needs a softer boundary; a muddy patch may need lifting and a local base repair. More blending will not fix an unsuitable undertone. Use the cause-and-fix table above to choose the correction before trying another layer.
How do I contour my nose as a beginner?
Start with the faintest amount on a small brush beside the bridge, then assess from straight ahead. Keep the tip soft instead of outlining it. Nose contour is optional: if the marks remain obvious after softening, remove them and leave the nose bare rather than making the lines darker.
Looks to try

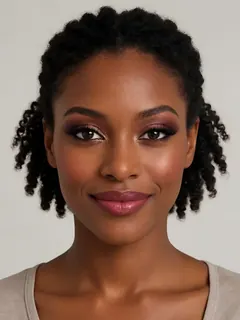
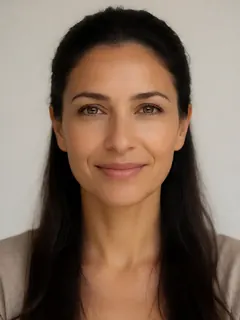
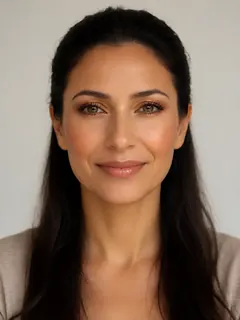
All faces shown are AI-generated fictional models, not real people.